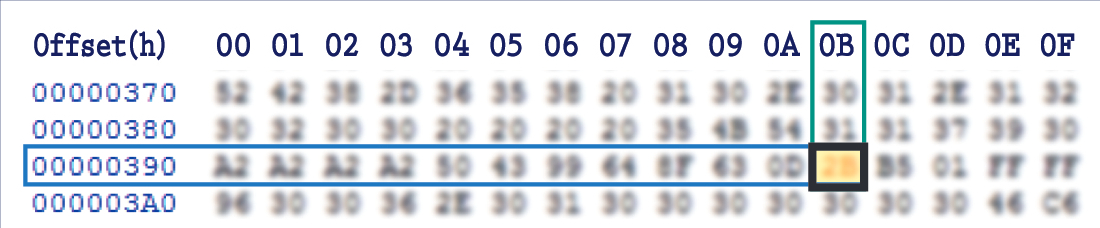
*How to identify 039B location value on the EEPROM
Before installing the new SEPDISP26 display, please read carefully the following instructions. Our technicians, for illustrative purposes only, have made a video tutorial about how to repair the module.
DON’T SKIP ANY STEP.

NOTE: For this modification, it is necessary to use an EEPROM programmer.
We recommend our SEP-EECLIP.
• First, set the programmer reading in 8 bit hexadecimal (HEX).
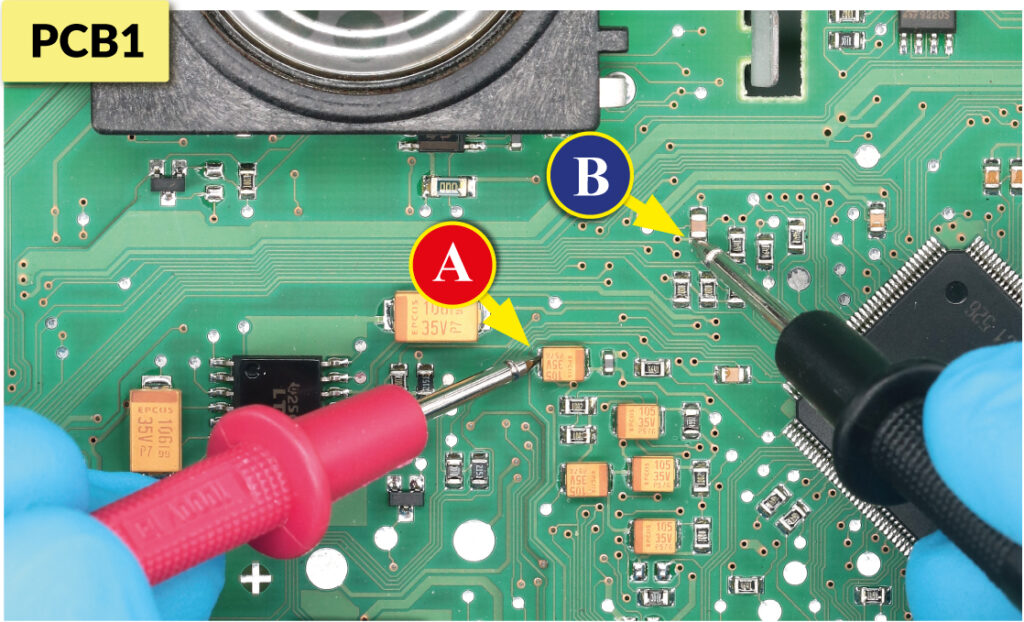
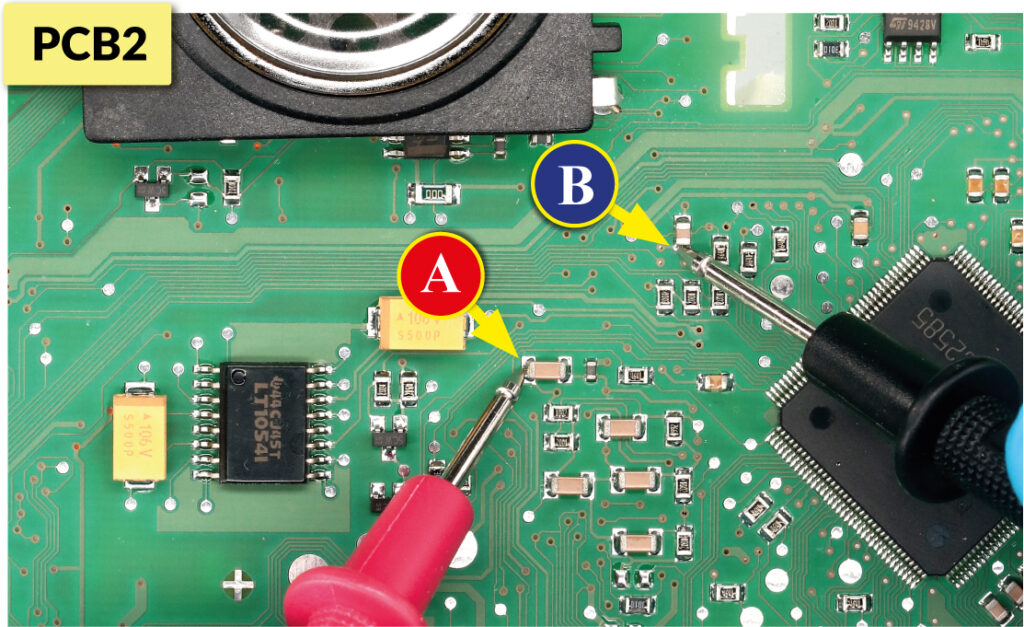
• De-solder the 24C08 EEPROM, highlighted in picture 3.
ATTENTION: Make a backup of the EEPROM, before the modification.
• To reach a voltage between 7.0V and 7.2V, it is necessary to modify the value of 039B location;
Please note that increasing or decreasing these locations by 1 HEX unit, the variation will be +/- 0.09V.
If not familiar with hexadecimal calculation, it is possible to use the calculation tool in the box beside, simply typing in the values.
NOTE: The tool works correctly only on computers. For the mobile version, click here.
Once these modifications have been done, measure again the voltage between A and B points and check that it actually is between 7.0V and 7.2V. If not, increase or decrease the location until the value is as close as possible to the right range.